
Motivation
Maintenance of the microservice configurations are getting harder when we have a lot microservices. By default, configurations divided into files and named by profile and microservice names like:
user-service-dev.yml
store-service-test.yml
If we need to do some configuration changes, we need to update these files and re deploy them again and again. For that reason, we may need to use database to store microservice configurations. In this article, you can learn how to do it also, you can check example code on the Github.
Setup
Let’s start quick and easy. Go to the Spring Initializr Website and add dependecies such as H2 Database for demo database system , Spring Data JPA for quick Database Setup and Config Server for serving configurations. Naturally you don’t need to H2 Database and Spring Data JPA, you can use a RDMS system such as Oracle, MySQL and create tables manually, but in this tutorial we will use them for building our example application.
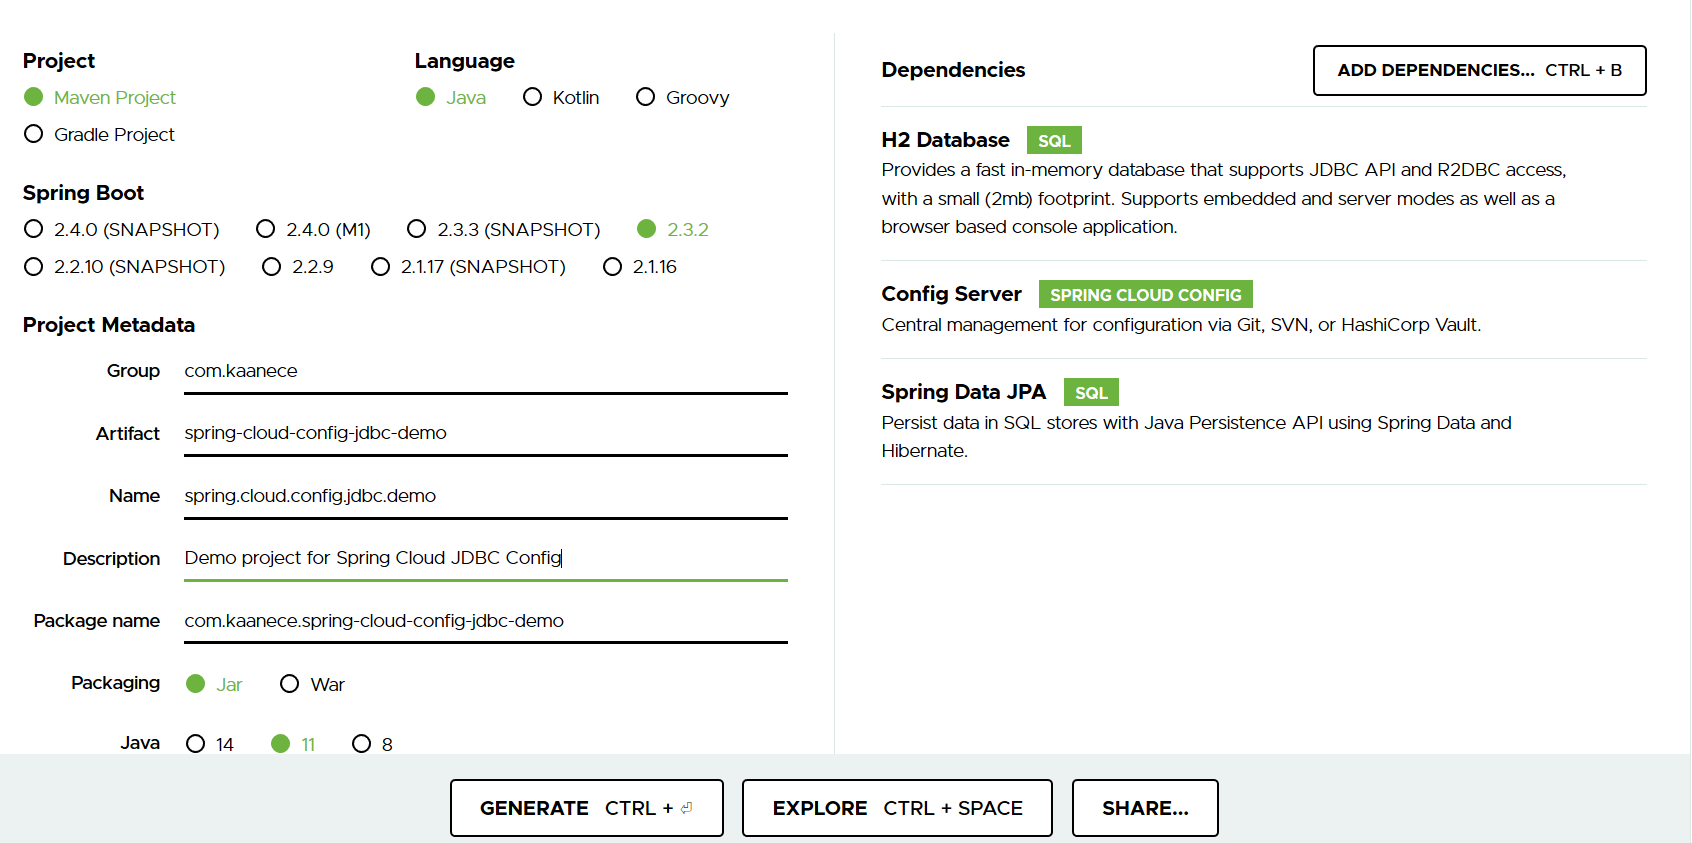
After that, click generate button and download project files.
Extract RAR file and import project to your favourite Java IDE. Add the following lines to the application.properties file.
1 | spring.profiles.active=jdbc |
We need to set active profile to jdbc because we need to tell spring to use jdbc based configuration server.
Spring Datasource properties setted based H2. You can use other RDMS systems.
We will use H2 console to send SQL commands. So, H2 console setted to true and console path setted to /h2-console
Spring Cloud Config default profile and default label setted. If no profile or label available, it will use default ones. Also, SQL Select command setted to fetch key and value from database. If you don’t want to use label value, you can exclude it from the where clause.
After that, create a package named model and create Property class on it.
We will map Property class to the PROPERTIES table. For this purpose, add the neccessary annotations to map values to the table.
1 | |
Add the EnableConfigServer annotation to the top of the main class.
1 | @SpringBootApplication |
That’s all. Run the application. It will be automatically running on the Port 8080. Properties table will be automatically created by hibernate.
Connect the H2 Console on the path http://localhost:8080/h2-console You don’t need to enter anything to the login panel if you don’t change anything to the properties file. Click the Connect button.
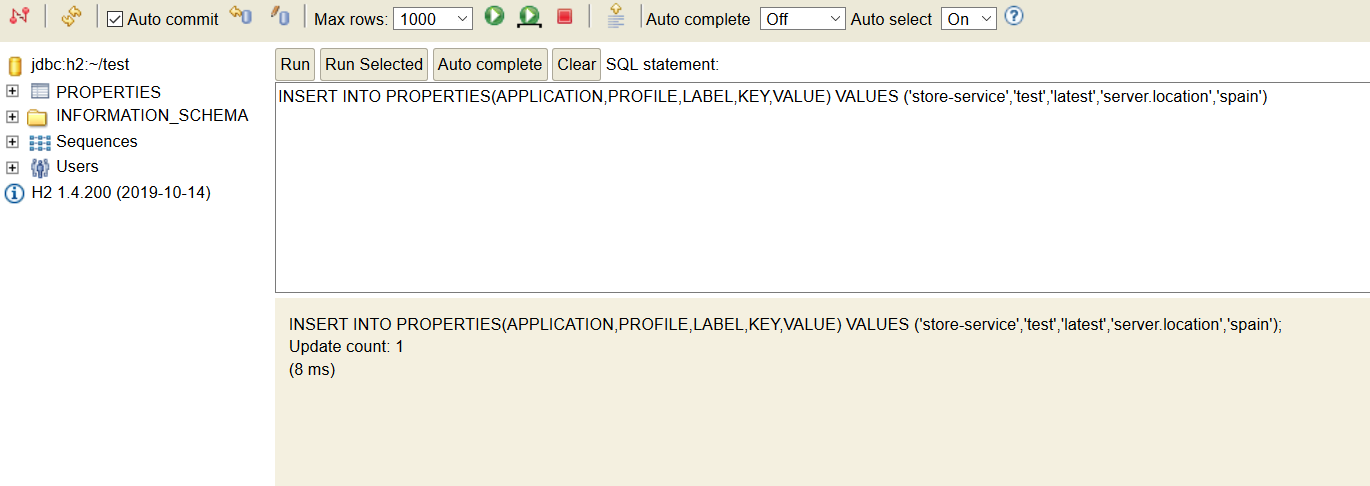
Run the following sql command to insert a new key value to the profile test and label latest
1 | INSERT INTO PROPERTIES(APPLICATION,PROFILE,LABEL,KEY,VALUE) VALUES ('store-service','test','latest','server.location','spain') |
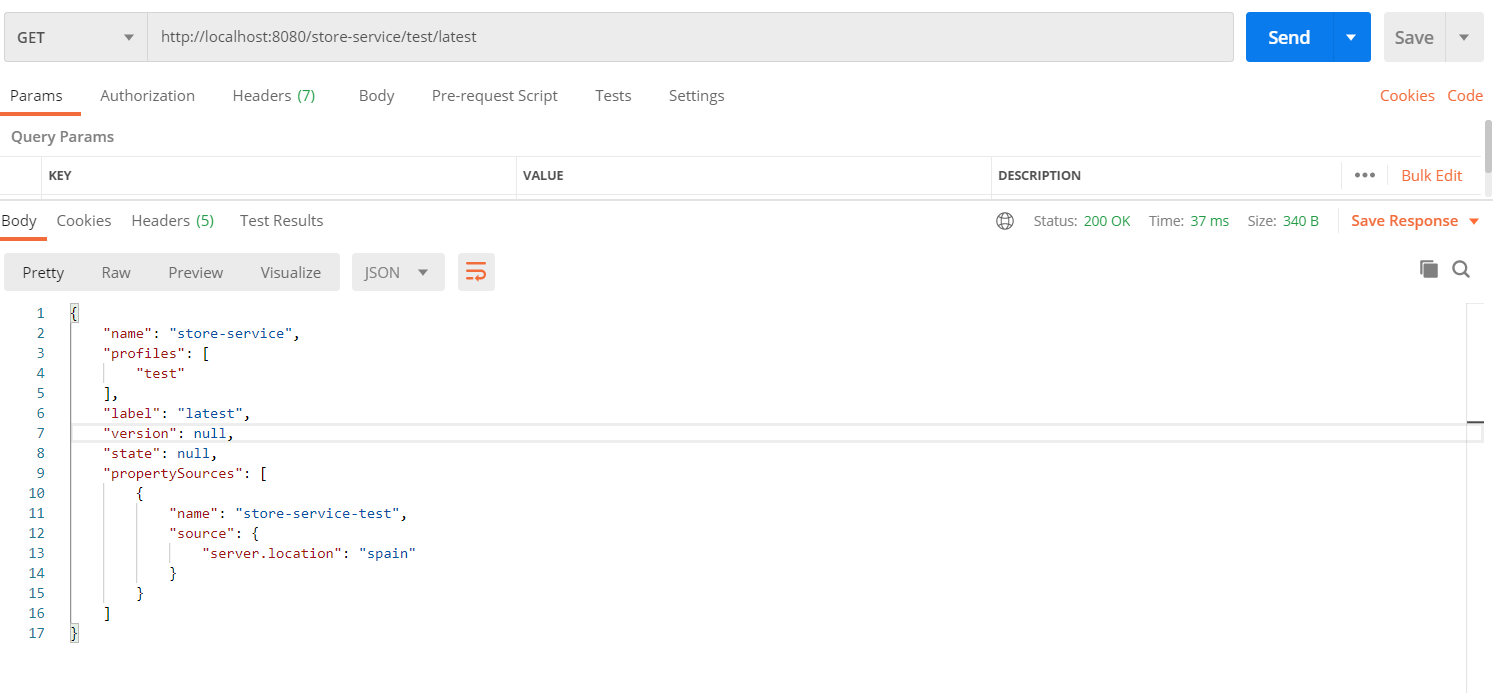
Now, test the Config server.
Feel free to contact and ask any questions. Happy coding!
Github Link: https://github.com/kaanece17/sping-cloud-jdbc-config
References: